
温馨提示:创作者曾就职于多家国内LCM显示行业上市公司,分别担任资深工程师、质量总监等职,有着十余年丰富的现场实战及品牌客户的管理经验。如果想要更加深刻的学习更多专业及有深度的LCM行业知识,记得关注设为“星标”,可以第一时间看到更新的文章,也可以免费咨询任何LCM生产过程中问题。
我给你用白话讲清楚,CG贴合后固化不足的风险,以及UV能量的测试方法:
UV 能量不足的全部风险(CG+OCA 贴合)
一、外观不良(立刻就能看到)
- OCA 固化不完全 → 气泡反弹
- 段差位置回弹 → 出现白斑、黄斑、暗影
- 边缘脱胶、翘边、进尘进水
- 贴合后有残影、鬼影、水波纹


- OCA 未固化 → 流动性大 → 压力不均 → 产生 Mura
- 盒压不稳 → LC 偏转异常 → 出现亮线、暗线、黑斑
- 局部电场受影响 → 画面不均、闪烁
三、信赖性失效(客户必测,一测就死)
- 高温高湿 → 气泡、脱胶、分层
- 冷热冲击 → OCA 收缩 → 亮线 / 竖线 / 显示异常
- 可靠性后出现大面积白斑、漏光
四、结构强度风险(直接报废)
- OCA 粘接力不足 → CG 易脱落
- 防摔性能下降 → 轻微撞击就分层
- 返修困难,撕起来易拉伤面板线路
五、最关键一句:UV 能量不足 → OCA 后固化不完全 → 内聚力不足 → 结构
强度与稳定性下降 → 外观、显示、信赖性全部出问题。
以下是给你的测试法子及照搬的测试SOP
1. 目的
确认 CG 贴合后,UV 固化能量满足 OCA 固化要求,避免固化不足 → 气泡反弹、脱泡不良、信赖性失效。
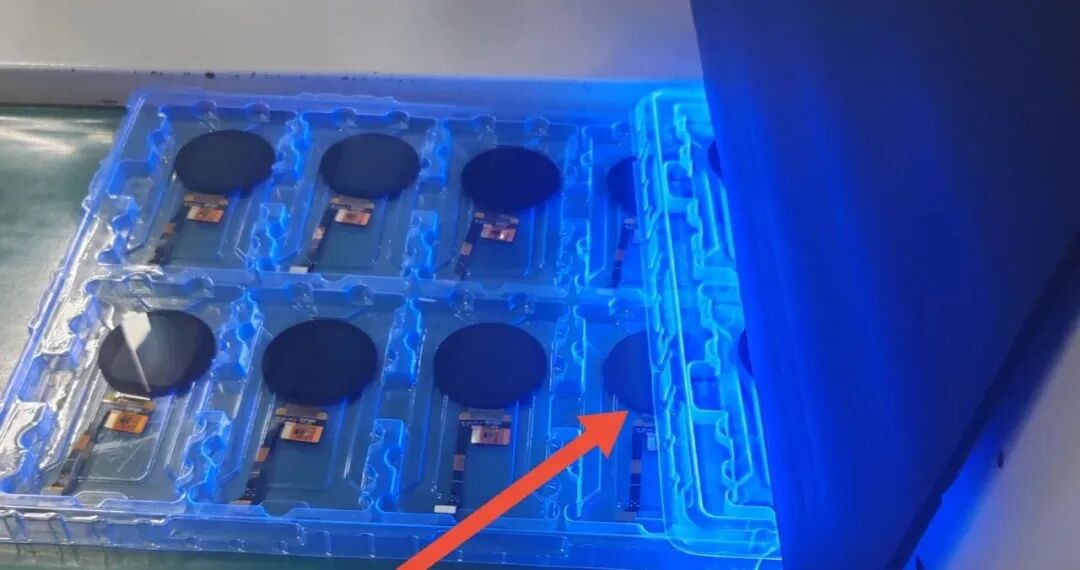
2. 适用范围
-
CG(玻璃盖板)+ OCA + LCD / AMOLED 全贴合 -
OCA:三菱 175、150、100μm 等 UV 后固化型
3. 测试仪器
-
UV 能量计(365nm 对应 LED 固化灯) -
量程:0–5000 mJ/cm²

-
UV 光源:LED 365 nm -
测试位置:与产品同一高度、同一平台 -
-
环境:常温、无尘、无强光直射
5. 测试步骤(标准 6 步)
-
打开能量计,选择 UVA / 365nm 模式。 -
将能量计探头朝上,放在 CG 贴合治具位置。 -
按下能量计 START / 开始。 -
启动设备 UV 固化,走完正常固化流程。 -
固化结束,读取能量计显示的 累积光积量(mJ/cm²)。 -
同一产品取 左、中、右 3 点 测试,记录平均值。
6. 三菱 OCA 标准光积量(具体参照OCA规格书)
- 三菱 175 OCA:2000–3500 mJ/cm²
- 三菱 150 OCA:1800–3000 mJ/cm²
- 三菱 100 OCA:1500–2500 mJ/cm²
你们现场 175 最常用:≥2000 mJ/cm² 合格
7. 判定标准
-
单点 ≥ 2000 mJ/cm² -
三点差值 ≤ 500 mJ/cm² -
满足 → 固化 OK不满足 → 调整 UV 时间 / 功率 / 灯距
8. 常见异常与对策
-
光积量偏低:灯管老化、灯脏、灯距太高→ 清洁灯罩、更换灯珠、延长时间
-
-
左右不均匀:灯管倾斜、灯条亮度不均→ 校正灯水平、调整电流
-
-
测出来波动很大:能量计未归零、位置不一致→ 每次测试归零、固定位置
一句话总结
CG 贴合 UV 光积量 = 能量计放在产品同一高度测一次,三菱 175 OCA
≥2000 mJ/cm² 就合格。
Friendly Reminder: The creator has served in multiple domestic LCM display industry listed companies, holding positions such as senior engineer and quality director, with over ten years of rich experience in field practice and managing brand customers. If you wish to learn more professional and in-depth LCM industry knowledge, be sure to "star" it for the first glance at the latest articles, or consult free of charge for any LCM production issues.
I'll explain in plain language the risks of insufficient CG bonding curing and the method for testing UV energy:
All Risks of Insufficient UV Energy (CG+OCA Bonding)
1. Appearance Imperfections (Immediately Visible)
Uncured OCA → Bubbles Rebound
Step Mismatch Rebounds → White Spots, Yellow Spots, Shadows
Edge Delamination, Warping, Dust/Water Ingress
Residual Images, Ghosting, Water Ripples Post-Bonding
2. Electrical/Display Failures (Your Primary Concern)
Uncured OCA → High Fluidity → Uneven Pressure → Mura Formation
Unstable Box Pressure → Abnormal LC Rotation → Bright Lines, Dark Lines, Black Spots
Local Electric Field Interference → Uneven, Flickering Displays
3. Reliability Failures (Customer Standards, Instant Rejection)
High Temperature/Humidity → Bubbles, Delamination, Layer Separation
Thermal Shock → OCA Shrinkage → Bright/Vertical Lines, Display Failure
Large-area White Spots, Light Leaks After Reliability Testing
4. Structural Integrity Risks (Total Scrap)
Low OCA Adhesion → CG Easily Detaches
Reduced Drop Resistance → Separation from Minor Impacts
Difficult to Repair, Likely to Damage Panel Circuits During Removal
5. Critical Point: Insufficient UV Energy → Incomplete OCA Post-Curing → Low Cohesion → Structural
Strength and Stability Loss → Appearance, Display, and Reliability Issues
Below is the test method and a copied Standard Operating Procedure (SOP) for your reference:
1. Purpose
Verify that the UV curing energy after CG bonding meets the requirements of OCA curing, preventing
2. Applicable Range
CG (Glass Cover Plate) + OCA + LCD/AMOLED Full Bonding
OCA: Mitsubishi 175, 150, 100µm, etc., UV Post-Curing Types
3. Testing Equipment
UV Energy Meter (365nm, corresponding to LED Curing Lamp)
4. Test Conditions
UV Source: LED 365 nm
Test Position: Same height and platform as the product
Environment: Room temperature, dust-free, no direct strong light
5. Test Steps (Standard 6 Steps)
Power on the energy meter, select the UVA/365nm mode.
Place the energy meter probe upward at the CG bonding fixture location.
Press the START button on the energy meter.
Activate the device's UV curing, running the full normal curing sequence.
After curing, read the accumulated photon flux (mJ/cm²) displayed on the meter.
Test at 3 points (Left, Center, Right) on the same product and record the average value.
6. Mitsubishi OCA Standard Photon Flux (Refer to specific OCA datasheet)
Mitsubishi 175 OCA: 2000–3500 mJ/cm²
Mitsubishi 150 OCA: 1800–3000 mJ/cm²
Mitsubishi 100 OCA: 1500–2500 mJ/cm²
Most commonly used in your field (175): ≥2000 mJ/cm² is considered qualified.
7. Judgment Criteria
Single point ≥ 2000 mJ/cm²
Difference between three points ≤ 500 mJ/cm²
Satisfy → Curing OK
Not satisfied → Adjust UV time, power, or lamp distance.
8. Common Anomalies and Solutions
Low Photon Flux: Lamp aging, dirt, high lamp distance → Clean cover, replace bulbs, extend time.
Left/Right Unevenness: Lamp tilt, inconsistent brightness → Correct lamp level, adjust current.
High fluctuation in readings: Meter not zeroed, inconsistent positioning → Zero before each test, fix position.
Summary